Showing posts with label gluten free. Show all posts

Tuesday, January 31, 2012

Candy Cane Beets and Kumquats


It's that time of year. Everything outside is white or grey. There is not a whole lot of fresh beautiful
produce coming our way, so you have to be pretty creative with what you do get. Last week in our CSA box, my family got a bundle of candy cane beets. Their inside striped with red and white is so festive, it is sure to brighten even the most depressed winter soul. I wasn't sure how I wanted to cook them, so I took a trip to my favorite grocery store where I found some lovely kumquats and nice firm lemon grass. The perfect something sweet and bright to enhance the natural flavors of the beets. It's a fast and easy one too, perfect side dish for midweek ribs or pair it with a salad for a positively spa worthy dish!


To prepare you will need:
2 medium candy cane beets- washed, peeled and sliced into 1/8 inch slices
3 firm kumquats, washed and very thinly sliced, removing the seeds
1 medium orange- juiced
1" segment of fresh Lemon Grass finely minced
1/4 cup of dry white wine
2 pinches of kosher salt
1 tablespoon good quality olive oil
Heat Olive Oil in a 10" Saute pan over medium high heat. Add beets, kumquats and lemon grass and saute slightly...2 minutes. Add white wine to pan and cook for one minute to cook off alcohol. Add orange juice, sprinkle with salt and cover. Reduce heat to medium low and cook, covered for 15 minutes or until beets are fork tender and kumquats are translucent. Remove the lid and increase heat slightly. Cook 2 more minutes or until liquid is reduced and slightly thickened. Transfer to serving plate and garnish with arugula sprouts, or any green spicy thing you can get your hands on. Serve hot or at room temperature for a meal that is sure to make even your tired blood smile.


Monday, November 21, 2011

Purple Potato Parmesan: the perfect Thanksgiving side dish


If your looking for a holiday side dish that combines visual wow factor with do ahead ease that also happens to taste really great, this could be your forever secret weapon. 'Purple Potatoes' you say? They have been a staple of Alaskan home gardens as long as I've lived here, the first time you see one you can't believe your eyes and now they are 'cropping up' in grocery stores all over the place. All hail the proliferation of this lovely tuber! Now you don't have to use purple potatoes, red or yellow waxy potatoes work fine, too. They just won't look as pretty.


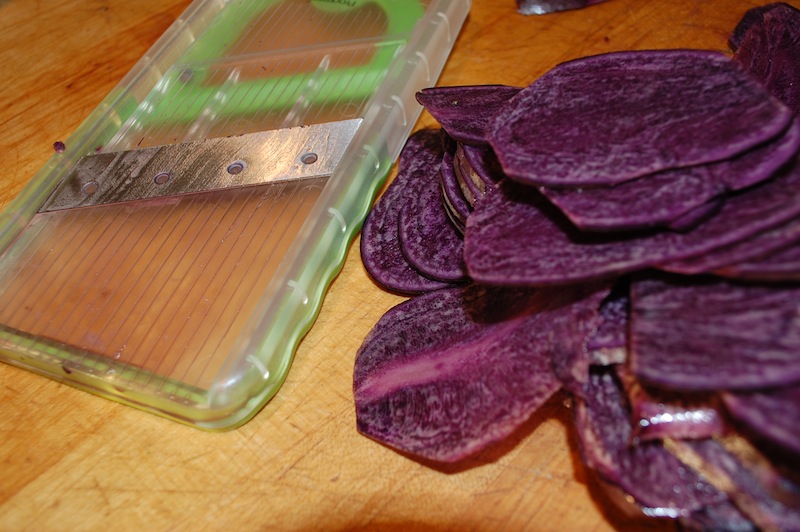
Start by washing and drying about 1 pound of potatoes. Using a pairing knife, cut off any eyes or blemishes. Slice the potatoes on the thinnest setting possible on your mandoline. It would be possible just very tedious to try to slice them with a knife.

Place potato slices in a bowl and pour over 1 cup of heavy cream. add a healthy sprinkle of salt and a dash of pepper and mix to coat.


Let that sit a minute while you grate your parmesan cheese: 


Grease a glass loaf pan and line it with parchment paper so that the paper comes up the sides of the pan. Place a thin layer of potatoes to cover the bottom of the baking dish then sprinkle with 1/3 of the cheese. Alternate this way until all potatoes and cheese are used up. 


Pour the cream left in the bowl over the layered potatoes. cover with another piece of parchment paper and place another loaf pan on top to weigh it down. 


Bake in a preheated 375 degree oven for 45 minutes to an hour, until potatoes are tender when poked carefully with a knife
Place on a sheet pan in oven to catch any drips.
Pull from oven and cool completely with the weight still in place. At this point it can be wrapped and stored in the refrigerator for up to 5 days. When ready to serve, run a knife around the edge to loosen and invert onto a sheet pan lined with parchment. peel off all the paper and cut into serving size slices. sprinkle a little more grated parmesan on top and bake in a 350 degree oven 15 to 20 minutes until sizzling hot and crispy on top. And then just try to keep your fingers off of it until dinner time!


Tuesday, October 4, 2011

Pecan Cherry Granola...it's what's for breakfast.


Granola is one of those things that if your used to eating the pre-made version and then you try some homemade stuff, it is so much better that it's hard to go back to the package.  
We've been making granola at the bakery for quite some time. It has become so popular that folks were coming in to buy it by the pound. This summer, though, it was getting scarfed by breakfast customers so fast we couldn't sell it in bulk, which caused a bit of a ruckus, so I decided to post my personal recipe...my kids eat this up so quick, sometimes I have to make it twice a week!

Pecan Cherry Granola:
1/2 cup orange juice
1/4 cup olive oil (I like the fruity-ness of olive oil here, if it doesn't appeal to you, use canola or your favorite mildly flavored oil)
1/2 cup dark brown sugar
4 cups rolled oats (NOT the instant kind!)
1 cup flax seed
2 cups pecans, roughly chopped
1 1/2 cups dried cherries, roughly chopped

Preheat oven to 350 degrees. 
In a large mixing bowl, whisk together the orange juice, oil and brown sugar. 
Add the oats, flax and pecans. Stir together until oats, etc are well coated.
dump out onto a large baking pan lined with parchment paper (the paper, while not absolutely necessary, makes it super easy to transfer to a container and helps make clean up a breeze)
spread out into an even layer on your pan and bake in the middle of your oven for 15 minutes. Pull pan out and give the granola a good stir to ensure even browning. Bake for 15 more minutes, stir again and bake for another 15 minutes or until it has reached your desired toasty-ness. Pull from oven and sprinkle cherries on top and then stirring them in while the mixture is still warm. Let cool COMPLETELY, then transfer to an airtight container by picking up the two long ends of parchment to form a sort of funnel, put one end into your container and pour. Sealed tightly this will last for months, except at my house.

Please Note: This formula is merely a template...you can use any fruit or nut or seed or juice or oil you like. If you like it stickier, use a little more liquid and don't toast it quite so much. Think of it as your blank breakfast canvass. 


Tuesday, March 22, 2011

Pho Chay


Pho Chay

In my winter haze I began fantasizing about travel to somewhere warm and cheap. Since actual travel was not in my budget, I satisfied my need by reading and cooking. I had heard of pho before, but for some reason this year it has gotten more press than ever. Maybe it's because of the clean, cleansing broth, or the slippery noodles and crunchy condiments that make you slurp and chew at the same time. Whatever it is, the pure satisfaction of this dish has had me in a trance all winter long. I found in my research that Pho is generally made with beef, Pho Bo. I knew that if I wanted to serve it as a regular dish on the bakery dinner menu, I would have to come up with a version that could be served as both a beef or a vegetarian dish. It may not be the classic, but it is delicious.

For the broth you will need:
4 ounces dried mushroom blend (preferably one that has shiitakes in it)
2 medium red onions skin on and whole
a fist sized knob of ginger
2 cinnamon sticks
1 tablespoon whole clove
1tablespoon whole coriander
1 tablespoon fennel seed 
3 whole star anise
2 tablespoons fish sauce
2 tablespoons turbinado sugar ( or a half dollar sized hunk of palm sugar, if you can find it)
salt to taste

To finish the soup:
1 package rice noodles, the thinner ones
chopped cilantro
chopped fresh basil
fresh mung bean sprouts
scallions thinly sliced in the bias
crimini mushrooms very thinly sliced
Lime wedges
Sambal Olek

To make broth:

soak dried mushroom blend in 4 cups water overnight in the refrigerator

Preheat oven to 350 degrees
Drain mushrooms reserving the liquid. Pat dry and toss with olive oil and salt. Spread mushrooms out onto a sheet pan lined with parchment and roast in oven for about 15 minutes until golden and even slightly crispy. 
While Mushrooms are roasting cut 2 red onion in half lengthwise and place on another sheet pan lined with parchment. Place whole knobs of ginger on same pan and roast them in the same oven
with the mushrooms. once the onions are caramelized and the ginger is soft, slide the onions into a large stock pot, chop the ginger into big chunks and put it in the pot along with HALF of the roasted mushrooms. Pour in 10 cups of water and bring to a slow simmer. As it's coming to temp, dry roast your spices in a clean dry saute pan and add them to the pot. Add salt and sugar and fish sauce. Let simmer gently for at least 1 1/2-2 hours. Strain broth and keep very hot until ready to serve, checking the spice and adjusting as needed. (or if your doing it ahead chill and store for up to one week)

Bring 6 quarts of water to a boil in a large pot and add rice noodles cook, stirring frequently. boil until just tender then drain and toss with a tablespoon of vegetable oil to keep from sticking together. Set aside until ready to assemble.

To serve:
Put noodles in bottom of bowl. Sprinkle on some of the roasted mushrooms and some of the sliced fresh mushrooms. Ladle hot broth over this and serve at table with the condiments on the side, so people can put on what they like. Serve with a nice refreshing bottle of 'Red Saigon' (over ice, the way they do it down there!) and you'll feel like you've had a little trip to Vietnam, sans the jet lag. 


Wednesday, December 22, 2010

Coconut Macaroons- 2010 holiday cookie of the year.


Coconut Macaroons...not really a macaroon, per se, but people seem to know what we mean when we call them that, so there you go. These are so gooey and sweet and SIMPLE (and gluten free! YAY!), they are the perfect addition to your holiday cookie list. They are so popular this year we have had a hard time keeping them in the case!

1/2 cup sugar
4 cups sweetened coconut
3 egg whites- beaten lightly
2 Tablespoons melted butter
1/2 teaspoon almond flavoring
1/2 teaspoon vanilla extract
pinch salt

Beat egg whites while slowly pouring in the sugar. beat til just barely holding a peak when whisk is removed. Fold in remaining ingredients.
Drop spoonfuls onto a parchment lined cookie sheet. Use fingers dipped in water to neaten the shape.
Bake in 325 dgree oven for 10 minutes or until slightly browned.
cool well before moving. To totally guild the lily, drizzle melted chocolate in a fancy design on top.
Yield 24 to 36 cookies, depending on how big you make them.
Keeps in airtight container 1-2 weeks. perfect for mailing.

Monday, November 15, 2010

Soup of the day: Potato cheddar Beer

I wake up every morning and listen to the local public radio station to get the weather and local goings on. this morning as I drank my coffee and got my morning update, I could hear the wind and the sea raging outside my window. Winter is definitely here and the gale warnings the gal on the radio predicted for this morning are proving to be true as we watch the waves crashing on the beach behind the bakery. It's a good day for this soup, but then, it always is, gale or not.
The secret is in the beer:

Potato Cheddar Beer Soup
1 medium onion, chopped
4 ribs of celery, roughly chopped 
1 bottle of beer
6 medium potatoes (i use red, with the skins on, but any kind will work) roughly chopped
6 cups of water or vegetable stock
salt to taste
8 ounces cream cheese
3 cups cheddar cheese- shredded
In the bottom of your soup pot, with a little oil, saute the onion and celery until translucent, even a little carmelized. Add the beer scraping up the brown bits off the bottom of pan. Cook 2 minutes to burn off alcohol. Add the potatoes, water and salt. Cook over medium high heat until potatoes are soft. drop in cream cheese and let sit 10 minutes to soften. Blend with an immersion blender until very smooth. Whisk in the cheddar while it is still hot. Serve immediately. If needed, reheat verry carefully. Garnish with shredded cheddar and chopped scallions. If your feeling really spicy top with chopped jalapenos. 
Serve with fresh bread and butter and...you guessed it, a nice cold beer! 

Wednesday, October 20, 2010

Ginger Pickled Salmon

This is a great way to use frozen salmon and an awesome pantry item to have for the holidays. Quick and festive, what can be better?


When life gives you salmon...lots of salmon, you get pretty creative as to how to prepare it. This has turned into one of our favorites! We make for special catering events here at the bakery and at home we always try to have a jar in the fridge just in case we have to wow company on short notice. The appetizer we created by shredding it and putting it on cucumber rounds with wasabi and a cilantro blossom has become a crowd favorite...gets them every time!
To pickle 1 1/2 pounds of salmon (this is red salmon, but any kind works):
cut fish into little 2" strips about 1/2' wide...coat very thoroughly with kosher salt and place in a nonreactive container, covered in the refrigerator for at least overnight or up to 2 days (soak a little longer in clean water if it is salted more than 24 hours).
To make your pickling liquid:
in a medium saucepan stir together:
2 cups water
2 cups cider vinegar
1/2 pound fresh ginger- sliced thin
1 1/4 cup granulated sugar
1 1/2 T salt
1 1/2 T black peppercorns
2 t brown mustard seed (optional)
bring mixture to a boil, let cool and refrigerate overnight to chill completely.
Rinse salt from salmon letting the fish soak in cold water for a few minutes. drain well. put salmon into clean glass jars to two thirds full and top off the jars with the picking liquid. fit with a tight clean lid and refrigerate to cure for 3 days.
serve as shown above or just put it in a bowl and eat with your fingers like my 10 year old does...it's his favorite TV snack...such a good Alaskan boy!

Wednesday, October 6, 2010

King Salmon with honey cayenne glaze

 John went trolling for salmon today with his friend Harry. Harry is half of the wonderful couple that sold us the land on which the bakery now proudly calls home. He and his wife Shirley were very flexible and amazing when it came to doing the land deal, carrying the loan themselves at a time we were hard pressed to get credit from a bank. (The bank kept wanting to refinance my 10 year old car...they put more trust in the car than my business, which is window into the difficulties the super-small start-ups go through) We faithfully made our payments and saved our money, and eventually...thanks to the fact we had an asset that was tangible, we were able to design and build our dream bakery. We have worked hard to live up to the town's needs and expectations and we are grateful to all those who helped us along the way. Today, this one is for Harry and Shirley...Thank You! And Thanks for taking John out so he could bring home something that's a little rare this time of year. Fresh King Salmon. This particular fish is what's referred to as a 'feeder' king. King Salmon spawn after 5 years or so, until then they roam the oceans building up fat reserves for their harrowing journey upstream. Where we live, on a bluff about 500 feet above the shores of Cook Inlet, we have a very fine and expansive view of a particularly popular spot for these feeder kings and we watch all winter as, at times, a dozen boats or more are making the slow movements back and forth indicative of trolling. John came home with two fish, one a white king salmon (I sadly did not get a photo of before it was processed for the freezer). The other was a fine light pink gem, very fatty and beautiful pale color due to the cold temps and season.

To cook it, I decided to keep it simple and sear it skin side down and then finish it under a broiler with this super simple honey cayenne glaze. 
To make the glaze:
1/4 cup honey- any kind- go crazy!
a pinch of cayenne pepper 
stir it up in a little dish and set aside.
Heat up a cast iron skillet with a tablespoon or two of olive oil. place fish in when it's just smoking and sear the bottom not moving the fish at all...4 minutes. Glaze the fish once or twice while on the stove , putting another coating on right before moving pan to the broiler. Broil another four to 5 minutes. This was a thick filet, so I check it once and glaze it again before giving it two minutes more. Pull from oven and let sit to rest, covered for 3 minutes. Slather on the last of the glaze right before serving. 
We ate ours with crisp green salad and fresh ciabatta bread from the bakery...divine!

Wednesday, September 29, 2010

Midweek dinner...baby back ribs


I know most people don't associate wednesday nights as rib nights. Ribs are something you have on saturday when you have all day to tend the fire, right? Not so, I say! Need a quick prep, no fuss meal anytime...babybacks are your friend. An hour in the oven is all you really need. One hour of undisturbed alone time for you to take a long hot shower. Or as Ruhlman so gently put it in his roast chicken post, go have sex. I bet there's even time for a shower afterwards. Otherwise you can help the kids with their homework, have a glass of wine...whatever. One winter a few years back, I discovered the true beautiful simplicity of this method, which was introduced by my friend chef Ryan Lee. I had ordered 130 pounds of ribs for a cast party after the local holiday performances of the Nutcracker Ballet. My kids were in it along with half the town and the party, especially the ribs were a huge deal. Usually they are lovingly slow barbecued by our friend, Blake LaRue, but Blake's back went out the night before, leaving him completely unable to perform his 'cuing magic. I knew I could put them in the wood fired oven, but how to know they would be perfect? Ryan suggested I use his method that works for one rack or twenty, in a word, foolproof. We set them up in hotel pans with lots of aromatics in the bottom and baked them as directed. Sure enough, they were beautiful! It is now my go-to rib recipe, with it I have the secret to making a lot of people very happy in a relatively short period of time, and that..on a wednesday night, is priceless!

Here's how we 'do' it:

1 rack of baby back pork ribs (or twenty, if that be the case)
1 oven- preheated to 350 degrees
1 roaster pan, rack in place, with tight fitting lid or foil to cover

Turn ribs to the bone side and make sure the butcher has removed the silver skin. The bones should be clearly visible, but if they are covered by a light silver film, you'll want to remove it. This can be easily done by pulling up a section at the edge and working your fingers to separate enough that you can get a hold of the whole end, it should pull away in one piece, use a sharp boning knife to remove any fragments left behind. Rub your spice blend into the flesh, generously, on both sides. If you don't have a favorite rib rub, try this:
2 Tablespoons Kosher salt
1 Tablespoon coarsely ground black pepper
2 Teaspoons paprika (smoked would be great here, too)
2 Teaspoons ground thyme
1 Teaspoon red chili flakes
1 teaspoon granulated garlic
1 teaspoon sugar
mix all ingredients well and rub away.

lay rubbed ribs on rack in roaster pan 
throw some garlic cloves and chopped onion in the bottom and pour in about a cup of water.
Cover tightly and bake in preheated oven for one hour. This your chance to take a walk, call a friend, or 'you know what'. If you need a side dish, you could throw some scrubbed potatoes on the rack above the ribs.  Put some greens in a bowl for salad and then off with you!
After an hour pull pan out of the oven, let sit for 5 to 10 minutes to rest. This is a great time to mix up my favorite bbq sauce:
1 cup ketchup
1/2 cup dark brown sugar
2 Tablespoons balsamic vinegar, the best you have.
Stir until smooth.
If you want to char the ribs on the grill, now is good time, but if your natives are restless and ready to eat, just cut them in between each bone and throw the whole lot in a big bowl, spoon on 1/2 the sauce and toss, coating the ribs evenly. Spill out onto a platter with the extra sauce on the side and your done. Time to pour another glass of wine and sit back and enjoy the quiet, as everyone will be too busy eating to make any noise...ahhh, wednesday!


Wednesday, March 3, 2010

Carmel Sauce


What smoothes the rough edges like a spoonful of carmel. Drizzled over ice cream, tucked into a cupcake or adding the goo factor to an otherwise perfectly staid cheesecake square, nothing satisfies quite like a smooth buttery carmel sauce. My partner in all things carmel- Sharon, and I have been intrigued by sugar in all of it's forms and trying to understsnd the science behind the conversions. She figured out that glucose is sugar with an acid added (honestly things get fuzzy for me from here on out, science is one thing, molecular science a whole 'nother...that Sharon, she's one smart cookie!) She adapted this recipe from Alice Medrich 'Pure Desserts" which calls for golden syrup. Since we do not always have access to this product and don't like the results we get from corn syrup, a conversion was in order. in this case, more sugar, cream of tartar and a little water are added to sub for the glucose. One very important thing to remember when working with sugar crystals is that one small grainl on a spoon or the side of a pan can infect the whole batch and rob you of that smooth amazing creation that is...

Carmel Sauce

3 cups sugar
1/4 cup water
1/4 cup Honey
1/4 teaspoon cream of tartar
1/4 t sea salt
2 cups heavy cream, heated to scalding
3 Tablespoons unsalted butter- cut in chunks
1 Tablespoon vanilla extract

Combine sugar, water, honey, cream of tartar, and salt in a heavy bottom 3 quart saucepan over medium heat, stirring with a wooden spoon until smooth and mixture bubbles around the edges. Wash down the sides of the pan with a pastry brush dipped in water. Cover and cook 3 minutes (steam will help melt the sugar crystals) Uncover and, using your wet pastry brush, wash down the sides of the pan again. (do not skip these steps, or you will not have smooth carmel!) Attach a candy thermometer and cook uncovered, and unstirred until the mixture reaches 305 degrees. Turn off heat and stir in butter chunks and slowly pour in hot cream, mixture will bubble like crazy, be careful, but keep stirring. Turn heat back on medium-high and stir until mixture resumes a healthy boil. Cook til it reaches 225 degrees for a thin sauce and up to 230 for a thick carmel like the one above. And for Carmel Apples - take it all the way to 250 degrees. (Sharon keeps a glass of ice water next to the stove to test droplets of carmel for the texture she wants. This is also a good thing to dunk your fingers in should you burn yourself!) Store in glass jars. Keeps a month or more in the refridgerator...except at my house! To reheat, place jar in a hot water bath for 20 minutes.

Wednesday, January 27, 2010

Marinara Sauce


"In the depths of winter I have found there lies within me an invincable summer." -Albert Camus
No, we don't have tomatoes growing fluently in our greenhouses at this time of year. In fact, we rarely do ANY time of year! (though there IS a local grange project in the works that could supply fresh tomatoes and greens to Homer year round....we'll keep you posted on that one) We are all for going local as much as possible, but when it comes to tomato sauce, well, let's just say it's very unrealistic. At the bakery, we have always made our own marinara using canned tomato products (thank you Sean Maryott) but at home, for the longest time, I bought jarred sauce. (I know, right?) Until I saw on some food detective show how much sugar is in one of those jars....whoa. So now, I make it at home, just like at the bakery, only I can it into 16 ounce jars. This batch will get you 6 of them, plus you'll have ample left over for supper that night. perfect.

Marinara

1 whole head of garlic...peeled and crushed
2 medium onions...roughly chopped
4 ribs celery...chopped
4 medium carrots...chopped
/2 cup red wine
1- #10 can diced tomatoes (6# 6oz or 12 cups)
1 6 oz can tomato paste
4 cups water
2 T salt
2 T sugar
2 T dried basil
2 t oregano
2 t thyme
2 t marjoram
2 T balsamic vinegar

In a large 8 quart heavy bottom pot heat 1/4 c olive oil over medium heat, add onions, saute 2 minutes, then add garlic, celery and carrot...continue to saute until onions are translucent. add wine to pan and stir to deglaze and cook off alcohol, about 4 minutes. add tomato products and water, stirring well to combine. add salt sugar, spices and vinegar. bring to gentle simmer, turn heat to low and cook gently for at least an hour, longer if you have time. Puree using an immersion blender (or a standup blender, but for the love of god...BE CAREFUL!) once it is the consistency you love...return to the stove and bing to a very low boil.
Prep jars by washing them and boiling in your canning pot covered with water...10 minutes. put lids and rings in a smaller pot covered with water and gently bring to simmer. Ever so carefully, remove the jars using tongs and set on a clean towel spread on the counter. Ladle in sauce to bottom of band. wipe the rims of each jar with a very clean cloth. then put on lids and bands...only screw on enough to hold lid in place. lower jars back into canning pot and add more water to cover jars by 2 inches. Bring to boil and hold at that temp for 35 minutes. remove from water and let sit undisturbed to cool. do not tighten rings. check seal (a tap in the center should not make a sound) any that have not sealed, refridgerate and use with a week. The rest can go in the pantry or any cool dark spot.
For more on canning:
'Putting Food By' is one of my favorite go to books for cannin' or jammin'!
canningpantry.com also has great online info...

Wednesday, January 6, 2010

Cream of Potato and Garlic Soup


Amazing how a few simple ingredients can come together in something so perfect for a quick meal when the cupboard is sorta bare and the roads are too icy to go to town. This is my kids favorite and one of the easiest soups to learn how to make. An immersion blender makes pureeing it a snap. (and at $20 bucks even in our alaskan hardware store, no reason to not have one) Also, We like red potaoes for this, leaving some of the skin on for extra texture and color. You could also add purple potatoes to the mix...or sweet potatoes...yum!

Cream of Potato and Garlic Soup

1 lg onion roughly chopped
4 stalks celery, roughly chopped
1 whole head of garlic, about 10 cloves, peeled and smashed
7 cups red potatoes, washed and eyes trimmed, but not neccessarily fully peeled, then cut into chunks
7-8 cups water
2 T Kosher Salt
8 ounces cream cheese

Saute onion and celery in 2 Tablespoons olive oil heated in a heavy bottom 6 qt. soup pot...after 2 minutes add the garlic and continue sauteeing until onions are translucent. add potatoes, water and salt. Bring to a simmer over medium high heat and cook until potatoes are tender, about 30 minutes. Turn off heat and drop cream cheese into soup and let it sit for 10 minutes to soften. Puree with immersion blender (or smash with a potato smasher, you won't have a perfectly smooth soup, but it will be tasty) Check spice, adding more salt if needed. Garnish with chopped fresh rosemary, or scallions or bacon or cheddar cheese or pretty much anything!

Tuesday, January 5, 2010

Granny T's veggie Soup

I had a special request for this recipe today and I totally thought I had it up...but no!
So, Amber...here it is!

! medium onion chopped
2 cloves Garlic minced
4 stalks celery, chopped
3 medium carrots chopped
4 medium potatoes chopped into chunks
1 cup frozen peas
1 12ounce can stewed or diced tomatoes
4 Tablespoons tomato paste (honestly, my grandma used ketchup for this)
1 Tablespoon dried Basil
1 Tablespoon Balsalmic vinegar
1 Tablespoon sugar
Salt to taste

Saute onions and celery in a soup pot over medium high heat with 2 Tablespoons olive oil
after 2 minutes add carrots and garlic and a couple of pinches of Salt
Continue sauteing until onions are translucent. Add potatoes, Tomatoes and paste and dried Basil, then add enough water to float all the vegetables, about 4 cups. Bring to a simmer and cook slowly until potatoes are done. Add Peas, vinegar and sugar and check for salt. then cozy up with a nice hunk of bread and say hi to my grandma while your at it...enjoy!

Monday, January 4, 2010

Ginger Beet Soup


Our local farmer still has just a few root veggies for us...beets. potatoes, rutibagas, even some cabbage!
the beets, particularly inspired me yesterday, along with the need for something cleansing and hearty at the same time, this soup definitely delivered! The briliant color also helps to brighten up even the darkest of days...
Ginger Beet Soup
1 lg onion, roughly chopped
4 stalks celery, roughly chopped
6 cloves fresh garlic
1/4 cup fresh ginger, peeled and minced
4 cups peeled red potatoes cubed
4 cups raw, peeled beets, cubed
1/2 cup white wine
6 cups water
1 - 12 ounce can coconut milk
Kosher salt
juice of 1/2 lemon

Saute onions and celery together in bottom of a soup pot with 2 tablespoons olive oil over medium high heat...after 2 minutes add garlic and ginger. Cook until onions are translucent and add white wine to deglaze pan and cook off alcohol, about 3 minutes. Then add potatoes, beets and water and throw in a few generous pinches of salt. Bring to a simmer and cook until potatoes are soft. Pull from heat, add coconut milk and puree with an immersion blender. Taste for seasoning, add lemon juice and more salt if needed. Serve with a little creme fresh, if you feel indulgent...as I usually am! Top with scallions for an extra bite and enjoy to the last crimson drop...

Wednesday, November 18, 2009

English Toffee


This is a classic favorite we have been making for years. The most important thing is to use an accurate candy thermometer or have a solid grip on the cold water test. If it's not brought all the way to 320 degrees, it will be more taffy than toffee and a filling breaker at that!
1# butter - melted
1# sugar (about 2 cups) - granulated
4 oz water
stir together in a medium heavy bottomed saucepan over medium heat until sugar is dissolved. attach a candy thermometer on the side and cook over med heat until mixture registers 310 degrees (the top side of Hard Crack Stage) immediately pour onto a sheetpan fitted with a parchment paper liner... tilt pan slightly to distibute, or smooth carefully with a spatula, work quickly! Let cool about 10 minutes until sugar is hard, but still hot. sprinkle on chocolate chips (we use semi sweet, though Dark or milk would work here, too) It takes about 2 cups. Let sit until chocolate is shiny, about 15 minutes. spread melted chips smooth (an offset spatula works great for this) and sprinkle on finely chopped nuts (we use pecans, but again, you could use walnuts or even slivered almonds) let cool completely. A quick trip to the fridge once it's room temp will help set the chocolate and firm things up. Break into pieces and package as desired. Will keep in an airtight container for 2 months...unless it's at my house!

Sunday, November 8, 2009

Roast Chicken

We make alot of roast chicken...not something we serve here at the bakery, necessarily, but it is a staple on our dinner repetoire when asked to cater casual dinners...not to mention for chicken soup...which we made 3 times last week now that flu has hit town!
We buy free range, mostly, often organic,( but sometimes we can't justify the doubled price tag.)
Start by rinsing chicken well and pat dry lightly with paper towel let sit to air dry a moment while you prepare the mirepoix base.
This one has onion, celery and sweet potato

line the bottom of your roasting pan with the aromatics and place the chickens on top.
Core and cut into thick slices, one green apple and stuff it into the cavity
rub the skins with olive oil and sprinkle with a healthy layer of salt and a few grinds of the pepper mill
Add any spices you wish to this layer...thyme is a favorite
Fold the cavity closed and pull the legs together over the opening. use a 6" skewer to keep the legs together
(Some folks insist trussing is the only way, but, we think this works as well)
Pour about an inch of water into the bottom of the pan and place in a preheated 350 dgree oven (moderate heat)
uncovered. depending on the size of your bird, it will take 1 1/2 to two hours to roast. It should register 160 degrees on an instant read thermometer when done. (or the leg will pull away easily and the juices run clear) Let rest 15 minutes before carving.

This is where the brick oven really shines. It makes some lovely breads, it's true, but meats roasted this way are spectacular!

Sunday, November 1, 2009

Lemonade...a little summer in a glass!


We are not big soda people around here...we don't sell anything in a can or bottle actually. We make ice tea and all the steamers and the coffee drinks possible, but when people want something cold and refreshing...we give them our homemade lemonade. I originally found the recipe for this in an old Joy of cooking and I loved the fact that it used all the lemon...skins and all. In the end, the rinds all sugared and dried, have become the most popular part! I have to say, the lemonade itself is pretty darn good, too!

Using a potato peeler, peel the lemons, being careful to only take off the yellow skin, leaving the bitter white pith behind.

Put in a pot with sugar and water and gently bring to a simmer...cook 10 minutes until sugar is very well dissolved and rinds are transparent and curly.

While the above mixture simmers, juice the lemons. once syrup is done, cool slightly and strain into the juice. That is your lemonade concentrate. Take the rinds and sprinkle with granulated sugar to coat. spread out on parchment paper and let dry.
To assemble, fill a glass half way with ice, the water to an inch or so from the top then top off with your concentrate. (we use about 3 ounces of concentrate in a 16 ounce glass) Put your dried lemon peel on top, and you have summer in a glass!

p.s. It goes great with gin or tequila, for a little after work refresher!
p.s.s. You could also do this with limes...marguarita's anyone?
p.s.s.s. Big Thanks to Donna Turner Ruhlman for her allowing me to ask the silliest of photography questions ("Yes, a white card is just that...a white card! Who knew!) and for sharing her knowledge with so much encouragement!

Saturday, October 10, 2009

Bread and Butter Pickles...a memory of taste


For the first four years of my life I lived with my grandmother, along with my three older siblings. We were quite a handful, I'm told and my grandparents were old school... it was german farm life...washing on Monday, ironing on Tuesday, baking bread on Wednesday. Each season had it's own list of tasks, always preparing, planning or harvesting something or lots of things.As strict as they could be, we had dessert every night after dinner and I loved Thursday because it was chocolate pudding day. Grandma would make it in the afternoon and pour it into individual bowls and let it cool on the counter, where it would form the best skin. I know now that it's preferrable to cover your pudding to avoid the top drying out, but when I was a kid, it was my favorite part. The other absolute favorite thing my grandmother made every year was bread and butter pickles. They were always brought out at dinner, and had they allowed me to have more than 'just a little' I surely would've eaten a jar a night. We moved out of their house about the time I started school and whenever grandma visited she would bring me a fresh jar. It made the difficult transition somehow easier knowing I had something of her around always. (I know, they were just pickles...give me a break, I was five!)
Still, whenever I miss my grandmother, (who died 20 years ago!)... to conjure her up, I make a batch of her pickles.

Granny T's Bread and Butter Pickles

6 Qts or 15- 6" cukes, sliced thin
6 medium onions, sliced thin
1/2 cup pickling salt
mix these together thoroughly in a large glass bowl
Let sit 3 hours and then drain, but do not rinse
in a large stainless pot mix:
6 cups white vinegar
4 1/2 cup sugar
1/2 cup whole yellow mustard seed
1 teaspoon celery seed
Bring brine to a boil, add cukes and bring back to a low boil.
ladle into hot jars and process in a hot water bath 10 minutes
Yield about 8 pints